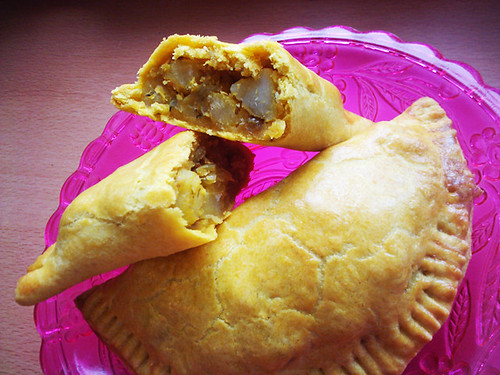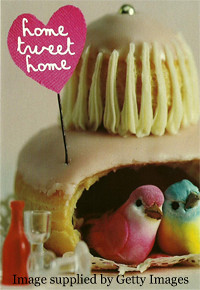
I must apologise for the lateness of this blog, I try to post every Sunday but unfortunately this week I got a nasty case of food poisoning from some mussels! Boo to them, it's definately put me off shellfish for a little while! Is it completely sad that the main reason my food poisoning upset me was because I couldn't blog? Hmm... shall I grab the geek glasses and scrunchie now?
I think I was mainly disappointed as I have been looking forward to trying this recipe ever since I bought BAKED - New Frontiers In Baking by Matt Lewis & Renato Poliafito. Flicking through this book you can't help to salivate at all the gorgeous looking recipes and beautiful photographs. Next on my list to try is the Root Beer Bundt Cake with Root Beer Fudge Frosting - my man is a real root beer enthusiast and I've never made a bundt cake before - how exciting!
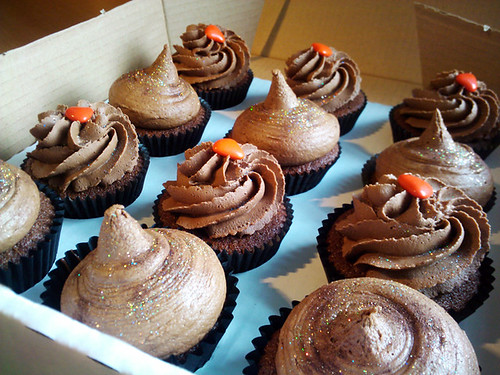
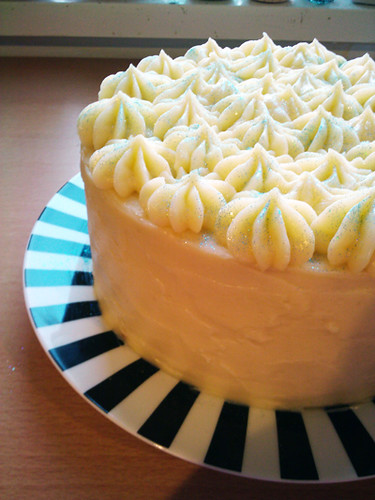
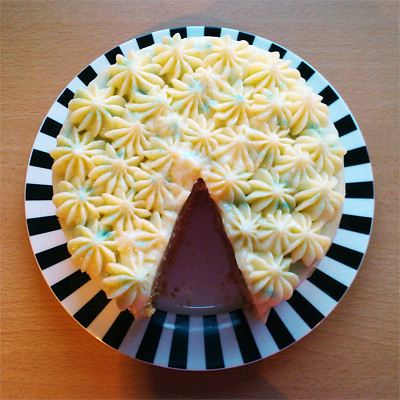
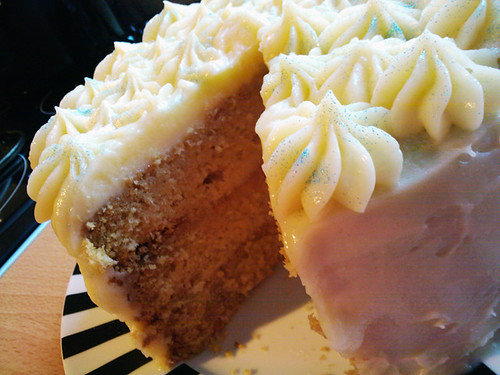
Now anyone that knows me well will be able to tell you I have a slight white chocolate obsession. I just love that super sweet creamy taste but I have found it is often drowned out by other flavours in baking even if that's by accident. This cake really is the opposite. The cake is just a vanilla cake with a bit of a twist in the baking but the frosting is a white choccy lovers dream! I think that is the main thing that drew me to this book, the recipes all use very different techniques than I am used to - I am sure that my whole life will be spent looking for the perfect cake recipe.
Just a warning - do not leave the frosting unattended for long while it's cooking - I did and had to deal with the consequence of scrubbing burnt sugary goop from the bottom of my saucepan!
I think I was mainly disappointed as I have been looking forward to trying this recipe ever since I bought BAKED - New Frontiers In Baking by Matt Lewis & Renato Poliafito. Flicking through this book you can't help to salivate at all the gorgeous looking recipes and beautiful photographs. Next on my list to try is the Root Beer Bundt Cake with Root Beer Fudge Frosting - my man is a real root beer enthusiast and I've never made a bundt cake before - how exciting!
Now anyone that knows me well will be able to tell you I have a slight white chocolate obsession. I just love that super sweet creamy taste but I have found it is often drowned out by other flavours in baking even if that's by accident. This cake really is the opposite. The cake is just a vanilla cake with a bit of a twist in the baking but the frosting is a white choccy lovers dream! I think that is the main thing that drew me to this book, the recipes all use very different techniques than I am used to - I am sure that my whole life will be spent looking for the perfect cake recipe.
Just a warning - do not leave the frosting unattended for long while it's cooking - I did and had to deal with the consequence of scrubbing burnt sugary goop from the bottom of my saucepan!

Whiteout Cake with White Chocolate Cream Frosting
Adapted from BAKED - New Frontiers In Baking by Matt Lewis & Renato Poliafito
Whiteout Cake Ingredients
350g cake flour (please see below notes for how to make this if you cannot buy it in bags)
35g plain flour
1 tbsp baking powder
1 tsp baking soda
3/4 tsp salt
110g butter, softened
110g vegetable shortening (such as Trex)
350g caster sugar
1 tbsp vanilla extract
1 large egg
360ml ice cold water
3 large egg whites
1/4 tsp cream of tartar
White Chocolate Cream Frosting Ingredients
150g white chocolate, roughly chopped
300g caster sugar
35g plain flour
375ml milk
80ml double cream
330g butter, soft and cut into small pieces
1 tsp vanilla extract
Whiteout Cake Method
Preheat the oven to 190C / 325F.
Butter three 8-inch round cake pans and line the bottoms with greaseproof baking paper. Sift the flours, baking powder, baking soda, and salt together into a large bowl and set aside.
Beat the butter and shortening on medium speed until creamy for about 3 to 4 minutes, then add the sugar and vanilla and beat on medium speed until fluffy, about another 3 minutes. Scrape down the bowl, add the egg, and beat until just combined. Mix on slow speed and add the flour mixture, alternating with the ice water, in three separate additions, beginning and ending with the flour mixture. Scrape down the bowl, then beat for a few more seconds to make sure everything is well combined.
In a medium bowl, whisk the egg whites and cream of tartar until soft peaks form making sure not to overbeat and then gently fold them into the batter.
Divide the mixture into the three pans and smooth off the tops. Bake for 40 to 45 minutes, rotating the pans halfway through, until a toothpick inserted in the center of each cake comes out clean.
Transfer the cakes to a wire rack and let cool for 20 minutes. Invert the cakes onto the rack, remove the pans, and let cool completely. Remove the parchment.
White Chocolate Cream Frosting Method
Melt the white chocolate and set it aside to cool - I use a microwave but you can do it over a double boiler if you prefer.
In a medium heavy-bottomed saucepan, whisk the sugar and flour together with the milk and cream and cook over medium heat, whisking occasionally, until the mixture comes to a boil and has thickened, about 20 minutes - keep your eye on it or you'll get a burnt brown goop!
Transfer the mixture to a metal bowl and beat on high speed until cool. Reduce the speed to low and add the butter, mixing until thoroughly incorporated. Increase the speed to medium/high and beat until the frosting is light and fluffy - about 3-4 minutes.
Add the vanilla extract and cooled white chocolate and continue mixing until combined. If the frosting is too soft, put the bowl in the refrigerator to chill slightly, then beat again until it is the proper consistency. If the frosting is too firm, set the bowl over a pot of simmering water and beat with a wooden spoon until it is loose enough.
To Assemble The Cake
Refrigerate the frosting for a few minutes until it can hold its shape well.
Place one cake layer on a serving platter, use a knife to flatten and smooth out the top then spread a good amount of the frosting on top. Add the next layer, cut and frost it the same way, and then add the third layer. Coat all over with a thin layer of frosting and then place the cake into the fridge for 15 minutes to set.
Now frost the sides with two thirds of the remaining frosting, smoothing to a nice rustic finish. Spoon the remaining frosting into a piping bag fitted with a large closed star nozzle and pipe little stars of frosting all over the top of the cake. Sprinkle with a bit of edible glitter if, like me, you are easily pleased by sparkly things.
Notes
This cake will keep in a tin at room temperature for up to 3 days. If your room is not cool, place the covered cake in the fridge for up to 3 days, removing it to warm up slightly about 2 hours before you plan on serving it.
If you cannot find cake flour you can make your own - 120g /1 cup cake flour can be substituted with 85g plain flour plus 2 tbsp of cornflour.
I buy most of my cake decorating items such as edible glitter and cupcake cases from the following online stores - www.cakescookiesandcraftsshop.co.uk and www.makeawishcakeshop.co.uk